
How to Clean Your PVC Reptile Enclosure Without Stressing Your Pet
New reptile owners often worry that a thorough cage cleaning will upset their scaly friend. The good news is that with the right approach, you can keep your PVC reptile enclosure clean and your pet stress-free. In this guide, we’ll walk you through how to clean a reptile enclosure step by step – from daily upkeep to monthly deep cleans – without stressing your pet reptile. A clean habitat is vital for your pet’s health and happiness, and by following these tips you’ll make the process safe, efficient, and even routine.
Why Regular Cleaning Is Important
A dirty enclosure isn’t just smelly or unsightly – it can harbor bacteria, parasites, and mold that make your pet sick. In fact, it’s estimated that up to 70% of reptiles carry Salmonella in their digestive tract, which can contaminate their enclosure and pose a risk to you as well. Regular cleaning removes waste and harmful germs, creating a healthier environment for your reptile. It also reduces odors that can stress your pet. Remember, reptiles have sensitive respiratory systems and unpleasant smells can make a snake (or lizard) stressed out. By keeping the habitat clean, you not only prevent illnesses but also ensure your pet feels comfortable in its home rather than anxious.
Think of it like your own home: you do small chores daily (like taking out trash) and bigger cleanups less often. Your pet’s enclosure needs a similar routine of spot cleaning daily and deeper cleaning periodically. Maintaining this routine will keep bacteria under control and even help your pet live longer. Plus, a buildup of “yuck” can make the terrarium smell bad and stress your pet, not to mention cause illness – another reason to stay on top of cleaning.
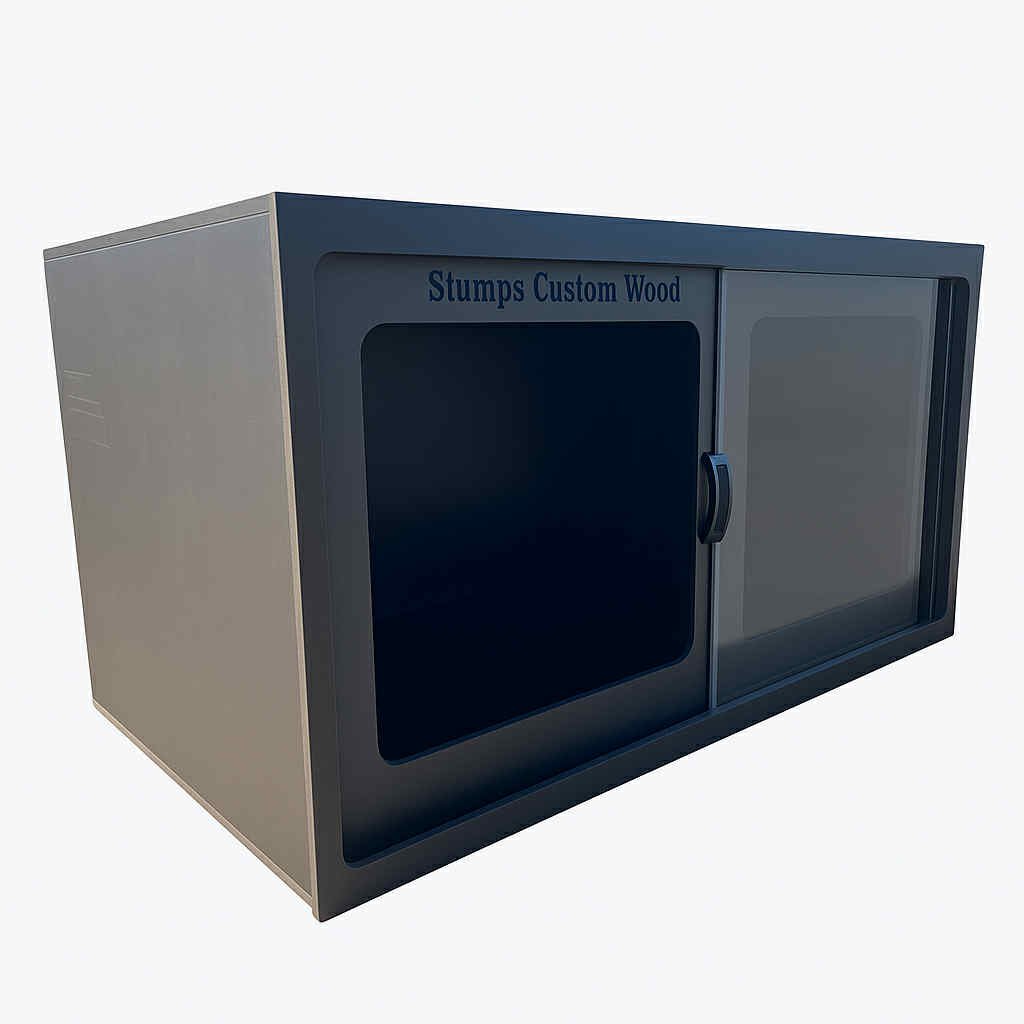
All our bioactive reptile enclosures use high quality PVC & top of the line ball bearing tempered glass rolling doors. Each 48 series measures 48" long and comes in a variety of widths and depths. Everything we offer can be customized if desired!
The cage itself is made from 1/2" PVC plastic, while the doors are made from 1/4 clear plexiglass and/or tempered Glass. All panels are laser cut and assembled by hand. The joints are sealed with silicone and will arrive fully assembled. It holds heat and humidity very well. This cage is ideal for many species
of small to medium sized snakes and lizards. Available in several color options. Options include screen cutout, heat tape, lighting, vents,
casters, and door style.
Benefits to PVC Enclosures:
-PVC is 75% lighter than wood & alternatives
-PVC is water proof
-PVC holds temperature & humidity to perfect conditions
-PVC is not reflective the way typical big box glass enclosures
-PVC is also chemical resistant so it can withstand cleaning with ease and not degrade over time
This cage is ideal for snakes, lizards, frogs, and invertebrates!
*Light Options
-Single or dual 6" screen cutouts. Cutouts will allow you to place a heat dome that measures 5.5" or less(not included).
-Ceiling Mounted 24" or 48" t5 HO grow light with UVB capabilities
Heat Options
-11"x16" heat tape
-Radiant Heat Panels (28W, 40W, 80W, & 120W)
*All cages are built to order and are subject to current lead times.*
*You must use a thermostat with the optional heat tape or heat pads. All American Cages and Custom Enclosures is not responsible for damages caused by heating elements!
How Often Should You Clean a Reptile Enclosure?
Establish a regular cleaning schedule for your reptile’s tank. This will vary based on your pet’s species, size, and enclosure setup, but a good rule of thumb is:
Daily Spot Cleaning: Every day, remove visible messes like feces, urates (solid urine deposits), shed skin, and uneaten food. This quick maintenance (often taking just a few minutes) prevents buildup of waste and bacteria. You can usually do spot cleans with your reptile still in the enclosure, as long as they are comfortable and you move slowly. For example, snake owners should clean feces or spilled water daily; lizard owners should remove leftover salad or droppings each day. Keeping up with small messes regularly means the habitat stays cleaner and odor-free, and your reptile will get used to your hand in its space, reducing stress over time.
Weekly Light Cleaning: About once a week (or every couple of weeks for very large or sparsely furnished enclosures), plan a slightly more thorough clean. This typically requires removing your pet to a temporary holding container (more on that below). During a weekly clean, you might replace all or most of the substrate if you use paper liners or spot-replace soiled patches if you use loose substrate. Wipe down high-traffic areas (like corners or under perches where waste accumulates) with a reptile-safe cleaner. Clean and refill water bowls and food dishes thoroughly. Not all setups require weekly full cleanings, but many keepers do a partial clean weekly to keep the enclosure fresh.
Monthly Deep Cleaning: Plan a major cleaning about once a month (or every 4-6 weeks), where you do a top-to-bottom sanitization. For snakes and many lizards, a monthly deep clean works well. Tortoises or very messy pets might need it slightly more often, whereas a small snake in a large enclosure might stretch to 6-8 weeks. During the deep clean, you’ll remove all accessories and substrate, scrub all surfaces, and disinfect the enclosure thoroughly. We’ll detail the steps in the next section. This is the cleaning that truly resets the enclosure to a pristine condition. Regular deep cleaning ensures any lingering bacteria or parasites are eliminated and prevents odors from building up. It’s also a chance to inspect the enclosure for wear and tear (like cracks or loose fixtures) and to refresh the habitat.
By following a daily/weekly/monthly schedule, you’ll find that each cleaning is easier and quicker – and your reptile will come to accept it as a normal routine. Consistency can actually reduce your pet’s stress, because they learn what to expect. A reptile that is used to gentle daily spot-cleans and calm handling during monthly cleanings will be far less anxious than one that is only disturbed unpredictably.
Preparing to Clean: Set Up a Safe, Stress-Free Space for Your Pet
Before any major cleaning, you’ll need to safely relocate your reptile. Never attempt to do a deep clean while your pet remains in the enclosure – you risk injury (from chemicals or falling décor) and cause unnecessary stress. Here’s how to prepare a secure temporary home so your pet stays calm:
Have a Holding Container Ready: Prepare a separate container or backup cage to house your reptile while you clean. This could be a plastic storage bin with a ventilated lid (and air holes) for a snake or lizard, a small terrarium or travel carrier, or even a pillowcase for a large snake (for very short durations). The container should be escape-proof, well-ventilated, and appropriate for your animal’s size. A plastic storage bin with a secure lid (with holes for airflow) works brilliantly as a temporary reptile holding pen. Line it with a paper towel or a clean old towel for traction and comfort.
Make It Comfortable: Move the container to a quiet, warm area away from drafts. If you have a secondary heat pad or another safe heat source, you can place the container partially over it to maintain temperature (make sure not to overheat and always supervise). Adding a hide or some of your pet’s familiar décor (if it’s reasonably clean) into the holding bin can give them a sense of security. For example, placing your gecko’s favorite cave or your snake’s hide box in the temporary tub can help the pet feel at home. Darkness also helps many reptiles feel secure, so consider draping a towel over part of the bin to reduce visual stress (while still allowing ventilation).
Gentle Handling: When removing your reptile from its enclosure, do so slowly and calmly. Confident but gentle handling is key to not spooking your pet. Support their body fully (for snakes, support as much of their length as possible; for lizards, support the torso and limbs). Avoid grabbing them suddenly or by the tail. If your reptile is flighty, you can coax them into a plastic tub or pillowcase inside the enclosure first: place the open container and gently herd them in. Stay calm – reptiles can sense rough handling and will become frightened if you’re nervous or forceful.
Minimize Time Outside: Try to organize your cleaning process so that your pet spends as little time as necessary outside its habitat. Gather all your cleaning supplies beforehand, and have a plan for the steps you’ll take. The goal is to get the cleaning done efficiently so your reptile can return to its familiar territory promptly. That said, don’t rush and skip steps – just be organized. The less time your pet spends in the holding bin, the less chance for stress.
Setting up this temporary space and routine not only keeps your pet safe and stress-free while you clean, it also allows you to focus on scrubbing the enclosure thoroughly without a curious snake underfoot or a lizard trying to escape. Once your reptile is secure and settled in the holding container, you’re ready to tackle the enclosure itself.

Give your reptiles the space they deserve with our 72" Black PVC Bioactive Reptile Enclosure, built for large snakes, lizards, and fully naturalistic setups. Whether you’re housing a boa, tegu, monitor, or creating a lush bioactive ecosystem, this 6-foot enclosure provides unmatched durability, insulation, and style.
Unlike other brands that ship flat-packed and leave you with complicated assembly, we hand deliver our enclosures fully assembled. That means 0% chance of shipping damage, no hours of stressful setup, and your reptile can be in their new home in under 15 minutes.
All orders are handcrafted and delivered within 8 weeks — far faster than competitors who often take longer and only ship unassembled.
Handmade from ½" black PVC
Tempered glass or acrylic sliding doors
Hand delivered, fully assembled (flat pack available by request with signed waiver)
Bioactive ready: deep base supports substrate & live plants
Custom sizing, vents, lighting cutouts, & heating options available
Why Choose PVC?
75% lighter than wood or glass tanks
Holds temperature & humidity efficiently
Non-reflective black finish reduces reptile stress
Waterproof & chemical resistant for easy cleaning
Built for decades of reptile keeping
Available Sizes (Most Common)
72" × 24" × 24"
72" × 30" × 18" H
72" × 30" × 30"
(Custom sizing available upon request)
Shipping & Delivery
Hand Delivery (Recommended):
0% chance of damage
Arrives fully assembled
Setup in under 15 minutes
Flat Pack (Optional):
Must contact us prior to ordering
Requires signed damage waiver of liability
Includes pre-drilled panels & hardware for assembly
⏱️ Lead Time: Under 8 weeks from purchase to delivery — significantly faster than competitors.
Ideal For
Large snakes: boas, sub-adult reticulated & Burmese pythons
Lizards: tegus, monitors, uromastyx, bearded dragons
Bioactive habitats with live plants, springtails & isopods
Both tropical & desert reptile setups
What’s Included
One 72" PVC reptile enclosure (fully assembled with hand delivery)
Sliding glass/plexiglass doors
Vents and customization options chosen at checkout
FAQs
Q: Do these ship assembled?
A: Yes. All standard orders are hand delivered fully assembled. Flat pack shipping is only available upon request with a signed waiver.
Q: How fast will I get my enclosure?
A: Within 8 weeks — faster than most competitors.
Q: What’s the advantage of hand delivery?
A: No shipping damage, no assembly stress, and you can have your enclosure set up in under 15 minutes.
Q: Can I order custom sizes?
A: Yes. Contact us for any depth, width, or height modifications.
Q: What reptiles is this best for?
A: Boas, tegus, monitors, ball pythons, bearded dragons, and many more medium-to-large reptiles.
Choosing Reptile-Safe Cleaning Supplies
Now that your pet is out, it’s crucial to use cleaning products that are effective yet safe for reptiles. Reptiles are highly sensitive to harsh chemicals and strong fragrances, so you can’t just use any household cleaner. Many common cleaners (bleach, ammonia, glass cleaners with alcohol, etc.) can irritate a reptile’s eyes, skin, and lungs. Here’s how to pick the right supplies:
Gloves & Gear: First, gather your basic tools: disposable gloves, sponges or scrub brushes (use separate ones dedicated only to your pet’s enclosure), paper towels or cleaning cloths, and a bucket or basin for washing décor. It’s wise to wear gloves to protect yourself from bacteria (and any cleaning agents), and perhaps eye protection if you’re scrubbing vigorously. If you’re using any chemicals, ensure good ventilation in the area.
Mild Dish Soap: Plain dish soap (unscented) is a great first-step cleaner for removing organic grime. A few drops in warm water creates a reptile-safe washing solution for scrubbing surfaces, glass, and décor. Dish soap alone does not disinfect, but it helps lift dirt and poop. Choose an unscented, gentle soap (like original Dawn or castile soap) to avoid perfumes. You’ll need to rinse thoroughly after use, as soap residue isn’t good for your pet.
Reptile-Safe Disinfectants: After washing, you’ll want to disinfect to kill germs. Avoid cleaners with ammonia or pine/cedar oils, as these are toxic to reptiles. Two of the best options for reptiles are chlorhexidine and F10 (a veterinary disinfectant). Chlorhexidine (sold as Nolvasan, Chlorhex, etc.) is a hospital-grade disinfectant that kills bacteria and fungi but is gentle and odorless when diluted correctly. Many commercial reptile cage cleaners use chlorhexidine because it’s effective without harsh fumes. F10 SC is another popular choice – it’s a veterinary disinfectant that kills bacteria, viruses, and fungi without toxic residue. Both chlorhexidine and F10 are concentrate liquids; follow the bottle’s dilution instructions (typically mixing with water in a spray bottle). These disinfectants are safe to use on plastics like PVC and won’t irritate most reptiles as long as surfaces are dried before the animal returns. Always allow the disinfectant to sit wet on surfaces for the recommended time (often 5-10 minutes) to actually do its job.
Diluted Bleach (with Caution): Household bleach (sodium hypochlorite) can be used to disinfect, but it must be used very carefully. Bleach is a powerful killer of germs, but its fumes are irritating and even toxic to reptiles (and you) if not fully rinsed. If you choose bleach, dilute it heavily (a common ratio is 1 part bleach to 10 parts water) and only use it in a well-ventilated area with your pet far away. Apply the diluted bleach to surfaces after pre-cleaning, let it sit for 10 minutes, then rinse, rinse, rinse with lots of water until absolutely no bleach smell remains. It’s critical to let the enclosure air out completely (and dry) before your pet goes back in – any lingering bleach odor can stress or even harm them. Because of these precautions, many keepers prefer to skip bleach in favor of the reptile-specific disinfectants mentioned above. Bleach is best reserved for situations like contagious illness outbreaks or parasite disinfection, where a stronger sterilization might be needed.
Natural Cleaners: For routine cleaning or if you prefer natural solutions, white vinegar is a handy option. A solution of vinegar and water (typically 1:1 or 1:2 ratio) is good for cleaning glass, removing mineral deposits, and deodorizing. Vinegar is safe for reptiles in small amounts and does not leave dangerous residue (just a pickle-like smell that dissipates). Its downside is that it’s not a broad-spectrum disinfectant – vinegar will kill some bacteria and mold but not all pathogens. You can use vinegar for light cleanings or as a follow-up rinse after other cleaners. Another natural option is steam cleaning: if you have a steam cleaner machine, the hot steam can kill bacteria and mites without any chemicals at all, which is very natural and leaves no odor.. Just be sure to remove your pet (never steam with an animal inside!) and let the enclosure cool down after using steam.
Avoid Harsh Chemicals: Never use products containing ammonia (like many glass cleaners), phenols (like Lysol or Pine-Sol), or strong solvents in your reptile’s enclosure. These can cause respiratory burns or neurological damage to reptiles. Also avoid any cleaner that leaves a heavy scent (scented sprays, air fresheners, etc., should not be used around reptiles). When in doubt, stick to the basics mentioned above – you don’t need fancy cleaning wipes or fragrant sprays marketed for general household use. Even some “all-purpose” cleaners labeled as natural may have citrus or pine oils that are irritants. It’s safest to use products specifically known to be reptile-safe (many pet stores carry terrarium cleaning sprays – just check ingredients and reviews) or simple home mixtures (like chlorhexidine or vinegar solutions).
Tools for Scrubbing: Have a few designated brushes: an old toothbrush is great for scrubbing tank corners, sliding door tracks, or water bowls. A larger scrub brush or sponge helps with broad surfaces. Use paper towels or dedicated old towels to wipe things dry. If your enclosure has glass panels, a scraper or razor blade can help lift stubborn dried poop or water stains (carefully, to not scratch PVC or glass). For PVC enclosures, avoid very abrasive scrubbers that might scratch the plastic – usually a soft sponge or cloth is enough to clean smooth PVC walls.
By gathering all these supplies ahead of time, you’ll ensure you can clean effectively without exposing your pet to dangerous chemicals. Your goal is a habitat that’s clean and disinfected, but also free of any cleaning product residue or strong odor. When you use reptile-safe products, you’ll achieve just that.
Step-by-Step: Deep Cleaning Your PVC Reptile Enclosure
Once your reptile is safely in its temporary home and you have your supplies ready, it’s time to deep clean the enclosure. PVC reptile enclosures are great because they’re non-porous and moisture-resistant, making thorough cleaning easier (unlike wooden cages that can absorb mess). Follow these steps to clean your PVC reptile enclosure without missing a spot:
1. Remove All Accessories and Substrate: Begin by taking everything out of the enclosure. Remove hides, water and food dishes, basking platforms, branches, plants, and any other decor. Set these aside to be cleaned separately. If your enclosure has electronic devices (heater, thermostat probe, lighting fixtures), unplug and remove those if possible, or cover them securely to protect from water. Next, take out the substrate (bedding). For loose substrates (like wood chips, coconut coir, paper pellets, etc.), scoop everything out into a trash bag – these generally should be discarded and replaced with fresh substrate during a deep clean. For carpet or turf liners, remove and set aside for washing. For paper towel or newspaper liners, dispose of them. Essentially, you want the cage empty. As you remove substrate, also get rid of any stuck-on clumps or bits; you can use a vacuum or dustpan to gather small debris. Tip: If any piece of decor is heavily soiled or impossible to fully clean (for example, a branch soaked with urates or a porous wood item with mold), it’s best to replace it with a new one rather than risk not fully sanitizing it. Porous materials like natural wood or rope are very hard to disinfect completely, so consider having spare decor items to swap in.
2. Initial Wash – Scrub Surfaces with Soap and Water: Now that the enclosure is empty, do a thorough washing of all interior surfaces. Using warm water and a reptile-safe soap or detergent (a few drops of dish soap in a bucket of water works well), scrub the walls, floor, and any fixed features. Use a sponge or cloth for flat panels and a toothbrush or small brush for corners, vents, and crevices. This step removes the grime: dried-on waste, shed skin bits, calcium deposits from water, etc. Don’t forget to clean the inside of the front doors/tracks or lid if it’s a front-opening or top-opening cage. Take your time to get every corner and crevice, as organic material left behind can harbor bacteria that disinfectant might miss. If you see any tough stains, you might let the soapy water sit on them for a minute or two to loosen it. For glass windows/doors, you can use the soapy water or a vinegar solution to remove water spots. Once you’ve scrubbed everything, rinse thoroughly. If your enclosure is small and portable, you might take it to a bathtub or outside and hose it down. If it’s not easy to move, use a clean bucket of water and rags to rinse multiple times. It’s very important to remove all soap residue now, because the next step involves disinfectant.
3. Disinfect the Enclosure: After the initial cleaning, apply your chosen disinfectant to all surfaces. This could be a chlorhexidine solution or F10 (spray it liberally), or a diluted bleach solution (1:10 bleach:water) if using bleach. Ensure the disinfectant gets into corners, around the edges, and on the floor and walls evenly. Keep the surfaces wet with the disinfectant for the required contact time – typically about 10 minutes for most products (check the label). This contact time is what actually kills the microorganisms. During this waiting period, you can work on cleaning the accessories (step 4). After the disinfectant has had time to work, wipe down or rinse the enclosure thoroughly. Most reptile-specific disinfectants (like F10 or chlorhexidine) do not need to be rinsed off with water after the correct dilution – you can simply let them air dry, as they leave no harmful residue. If using bleach or vinegar, however, you must rinse with water until no odor remains. Use your nose as a guide: the enclosure should have no strong scent once you’re done. A faint clean smell (like a slight vinegar smell) is okay, but even that should be minimal. Dry the enclosure with towels or allow it to air dry completely. Remember, a damp enclosure, especially a PVC one, can grow mold or raise humidity too much, so make sure it’s fully dry before reassembly.
4. Clean and Disinfect Accessories: While the enclosure interior is disinfecting or drying, clean all the décor and equipment you removed. This includes hides, bowls, rocks, branches, plastic plants, etc. For each item, use a similar two-step process: wash with soapy water, then disinfect. For example, scrub the water bowl with hot soapy water (a bottle brush is handy for bowls), rinse it, then soak it in a bleach solution or spray with F10. Many keepers will fill a sink or tub with a disinfecting solution and let accessories soak for 10-15 minutes. Make sure to completely submerge items or flip them to get all sides. Items like rocks can even be boiled in water for 30 minutes to sterilize (as an alternative to chemical disinfectant). Plastic or resin hides can be soaked in bleach solution then thoroughly rinsed. If you use anything porous (wood decor), you have a few options: if small enough, you can bake wood pieces in an oven at ~225°F (107°C) for 30 minutes after cleaning to help kill remaining microbes. Just be sure no chemical residue is on them (rinse first) and keep an eye on the oven. Caution: Never bake items with any plastic or artificial plants – those you should stick to chemical disinfectant or replace. After disinfecting, rinse each accessory very well with clean water and let everything air dry completely. You don’t want your reptile’s hide smelling like bleach or vinegar. This is also a good time to wipe down external surfaces of equipment like heat mats, thermostat probes, or light fixtures (unplugged!) with a damp cloth to remove dust.
5. Replace Substrate: Once the enclosure is clean, dry, and odor-free, put in fresh substrate or bedding. For a PVC enclosure, you might be using paper (newspaper, butcher paper, paper towels), reptile carpet, or a loose substrate (cypress mulch, coconut fiber, etc.) depending on your species. Use fresh, clean substrate; don’t reuse old dirty bedding. If you use things like reptile carpet or terrarium liners that are washable, make sure they’ve been thoroughly washed with hot soapy water and disinfected (some people run them in a washing machine with pet-safe detergent). Ensure everything is completely dry to prevent mold. Spread out the new substrate evenly. For a bioactive enclosure (with live plants and microfauna) the approach is different – you don’t typically replace all substrate at once or you’d disrupt the ecosystem. (Bioactive setups might require spot cleaning and partial substrate changes, but that’s a topic for another day.) Assuming this is a standard enclosure, new substrate will give a nice clean start. Tip: If you’re worried your reptile will feel too unfamiliar with a totally new scent everywhere, you can keep a handful of the old substrate (if it wasn’t soiled) and mix it in with the new, or retain one decor item unwashed, so that there’s a bit of their old smell remaining. This can help some reptiles feel at home more quickly after a deep clean. Just be cautious: only do this if the old substrate is dry and free of waste – you don’t want to reintroduce bacteria. It’s an optional step for particularly sensitive animals that get anxious in a “brand new” smelling cage.
6. Reassemble the Enclosure Layout: Now put back all the (now clean and dry) accessories and equipment. Set up the enclosure just as it was (mostly), or in a similar configuration that your pet is familiar with. It’s usually recommended to place essential elements like the basking spot or warm hide in the same location as before, so your reptile knows where to find heat and shelter. You can rearrange some non-critical décor for variety (this can provide enrichment for curious reptiles), but don’t completely overhaul the layout on the same day as a deep clean if your goal is to avoid stress. Too much change at once – new smells and new layout – can confuse and stress your pet. So, strike a balance: maybe add one new plant or slightly shift a branch for interest, but keep their main "home base" areas recognizable. Ensure all fixtures (lamps, heaters) are securely installed and working. Refill the clean water bowl with fresh water. Double-check that temperature and humidity devices (thermometers, hygrometers) are placed correctly and reading within the proper range for your species. Essentially, you want the habitat to be ready for your reptile to move back in comfortably, with correct conditions.
7. Final Inspection & Return Your Pet: Before bringing your reptile back, do a final safety check: no remaining cleaning odors, no wet spots, no chemical residues. If everything looks and smells good, you can gently place your reptile back into the enclosure. Do this calmly – support their body and let them get their bearings once inside. Many reptiles will immediately start tongue-flicking or exploring after a deep clean since everything smells different (even if you kept one familiar item, most of the cage will smell “newly cleaned”). This is normal. Give them some quiet time to settle in. Observe your pet for a bit to ensure they find their warm area and seem at ease. If your reptile is the type that gets very stressed, you might even cover part of the enclosure with a towel for an hour or two to make them feel secure as they adjust (for example, a shy snake might appreciate the extra privacy right after a cage overhaul).

All our bioactive reptile enclosures use high quality PVC & top of the line ball bearing tempered glass rolling doors. Each 96 series measures 96" long and comes in a variety of widths and depths. Everything we offer can be customized if desired!
The cage itself is made from 1/2" PVC plastic, while the doors are made from 1/4 clear plexiglass and/or tempered Glass. All panels are laser cut and assembled by hand. The joints are sealed with silicone and will arrive fully assembled. It holds heat and humidity very well. This cage is ideal for many species
of small to medium sized snakes and lizards. Available in several color options. Options include screen cutout, heat tape, lighting, vents,
casters, and door style.
Benefits to PVC Enclosures:
-PVC is 75% lighter than wood & alternatives
-PVC is water proof
-PVC holds temperature & humidity to perfect conditions
-PVC is not reflective the way typical big box glass enclosures
-PVC is also chemical resistant so it can withstand cleaning with ease and not degrade over time
This cage is ideal for snakes, lizards, frogs, and invertebrates!
*Light Options
-Single or dual 6" screen cutouts. Cutouts will allow you to place a heat dome that measures 5.5" or less(not included).
-Ceiling Mounted 24" or 48" t5 HO grow light with UVB capabilities
Heat Options
-11"x16" heat tape
-Radiant Heat Panels (28W, 40W, 80W, & 120W)
*All cages are built to order and are subject to current lead times.*
*You must use a thermostat with the optional heat tape or heat pads. All American Cages and Custom Enclosures is not responsible for damages caused by heating elements!
Tips to Make Cleaning Less Stressful for Your Reptile
Cleaning day doesn’t have to be a traumatic event for your pet. Along with the steps above, keep these tips in mind to minimize stress on your reptile during cleaning:
Stay Calm and Quiet: Reptiles can sense vibrations and sudden movements. Try to clean during a calm period of the day when there’s not a lot of chaos in your home. Speak softly if you need to, and avoid banging or clattering items around your pet. If you’re calm and gentle, your reptile will feel less threatened.
Handle Confidently but Gently: If you are nervous about moving your pet, the animal will likely be nervous too. Practice routine handling on non-cleaning days, so that when you do need to transfer them on cleaning day, it’s not a novel experience. For animals that hate being handled, consider using a snake hook (for snakes) or coax them into a hide or a small box they feel safe in, and then move that container. This way they feel hidden. Always support their body and avoid restraining them too tightly; you want them secure but not squeezed.
Maintain Proper Environment in Holding Bin: One stressor for reptiles can be temperature drop. While they’re out of their heated enclosure, make sure they stay warm enough. If cleaning will take a while, keep their temporary container in the same room (if it’s warm) or near a safe heat source (like a heating pad under one half of the bin, on a low setting). Monitor that it’s not overheating. Also, don’t leave them in direct sun or in a cold draft. A consistent, comfortable temperature will keep your pet calm.
Keep it Short and Sweet: As mentioned earlier, have a plan to work efficiently. You don’t want your reptile sitting in a box for five hours while you, say, repaint the enclosure or do a photo shoot of the décor. It’s best to avoid extremely lengthy cleaning sessions with the animal out. If you have a very large elaborate setup that takes a long time to clean, you might clean in sections (one half one day, the other half another day) to reduce how long the pet is displaced. Alternatively, prepare a larger temporary enclosure where your reptile can stay comfortably for an extended time if needed.
No Strong Odors: We’ve emphasized it, but it’s worth repeating: reptiles have a sensitive sense of smell. Any strong chemical or perfume smells can cause them anxiety or even physical harm. After cleaning, ventilate the enclosure well. If you can still smell vinegar or disinfectant, give it more time to air out. Some keepers use a fan to help dry and air out the cage faster. Your reptile’s return to the cage will be much calmer if the environment smells neutral (or only like their normal substrate). Remember, snakes especially dislike scented or pine cleaners, so stick to odor-neutral cleaning agents.
Positive Associations: While you can’t exactly give a lizard a “treat” the same way you do a dog, you can still create a routine where your reptile learns that nothing bad happens during or after cleaning. For example, some lizard owners might feed their pet after a cleaning session (assuming the animal is calm and it’s their normal feeding time) so that the reptile starts to associate the fresh, clean tank with getting a meal. (Be cautious not to feed a highly stressed animal; use your judgment if your pet is calm enough to eat.) Even simply returning them to a warm, clean environment where they can bask and then gently observing them can reinforce that everything is fine. Never punish or scare your reptile during cleaning – if they make a mess on you or try to run, stay patient. The goal is for your pet to trust you and the process over time.
Regular Handling and Habitat Changes: One way to reduce stress is to make cleaning feel normal. If you only interact with your reptile once a month to scrub their cage, of course they’ll be terrified on that day. Try to handle or at least interact with your pet regularly (depending on species). Also, do small enclosure maintenance tasks frequently (like spot cleaning, rearranging one plant occasionally, etc.) so the animal isn’t shocked by everything changing at once. A well-socialized reptile that sees you daily and perhaps gets gentle cage spot-cleans will often sit calmly during a deep clean because it’s used to the activity. As an example, some keepers note that their snakes seem to actually “wait at the front” when they’ve dirtied their cage, almost as if expecting the cleaning service! While that might be anecdotal, reptiles do thrive on consistency – they know when feeding day is, and they can learn when cleaning happens too.
By incorporating these practices, you’ll make the cleaning process as smooth as possible for your reptile. Each pet is an individual – some tolerate disturbance better than others – but all will appreciate a gentle approach and a clean, safe home afterwards.
Conclusion: A Clean Home for a Happy, Healthy Pet
Cleaning your PVC reptile enclosure is an essential part of good reptile care, and it doesn’t have to be a stressful ordeal for you or your pet. By sticking to a consistent cleaning schedule, using reptile-safe cleaners, and taking steps to keep your pet comfortable during the process, you’ll maintain a healthy habitat with minimal fuss. Over time, your reptile will come to realize that cleaning day is just a routine event – one that ends with a fresh home that’s free of mess and odors. In fact, many reptiles seem more content and active in a clean environment, since it more closely resembles the healthy conditions in the wild.
Always remember to observe your pet’s behavior: a happy reptile in a clean enclosure will exhibit normal behaviors like exploring, basking, and feeding. If you notice signs of stress (like a dark stress mark on a gecko’s belly, or a snake frantically trying to escape) after cleaning, double-check your setup – ensure the temps are correct and that no irritating smells remain. With experience, you’ll refine your technique to suit your individual animal’s needs.
In the end, a clean enclosure means a healthy pet and a healthier home for you as well. You’ll also take pride in seeing your snake or lizard in a sparkling habitat where you can easily observe them. So embrace the routine – equip yourself with the right tools and mindset – and you’ll find that cleaning your reptile’s enclosure can be quick, effective, and stress-free for both you and your pet. Happy herping, and enjoy your time with your reptile friend in their fresh, clean home!
Resources
Bearded Dragon Care Checklist: Everything You Need to Keep Your Pet Happy & Healthy – Comprehensive checklist for bearded dragon care and maintenance (Stump’s Custom Wood)
Complete Tortoise Enclosure Setup Guide (Indoor & Outdoor Tips) – Guide to setting up and maintaining a proper tortoise enclosure (Stump’s Custom Wood)
Where to Buy Large Custom PVC Reptile Enclosures Online – Overview of top suppliers and tips for purchasing custom PVC enclosures (Stump’s Custom Wood)
Stackable PVC Reptile Enclosures – Space-saving solutions for stacking enclosures securely (Stump’s Custom Wood)
Reptile & Pet Supplies Shop – Custom Enclosures & More – Browse our collection of custom PVC enclosures, racks, and accessories (Stump’s Custom Wood)
Citations
How to Clean and Sanitize Your Bearded Dragon’s Habitat – Zen Habitats
Cleaning your reptile's habitat - Tampa Vet
https://www.tampavet.com/exotics-blog/cleaning-reptiles-habitat/
Snake Terrariums 101: Your Guide to Safe Cleaners
https://www.oxyfresh.com/blogs/pet-health/snake-terrariums-101-your-guide-to-safe-cleaners